Migration
The migration route rebuilds a legacy BI model — Qlik, Power BI and similar — on your data platform. The output tables keep their exact names, so your existing BI app can reconnect. The rebuilt numbers are checked against the legacy app's numbers.
- The legacy model decoded with ekai-decode (see step 1)
- The legacy data loaded into your warehouse, and a connection to it
How It Works
| Tab | What happens |
|---|---|
| Model Details | Name, requirements, connection, the uploaded bundle |
| Business Requirements | Review the imported requirements — keep, review or change |
| AI Modeling | Plans the target model and its lineage from the legacy one |
| Data Transformation | Builds the tables with dbt, under their exact legacy names |
| Validation | Compares the rebuilt numbers with the legacy app |
| Code Sync | Download or sync the artifacts |
1. Decode the Legacy Model
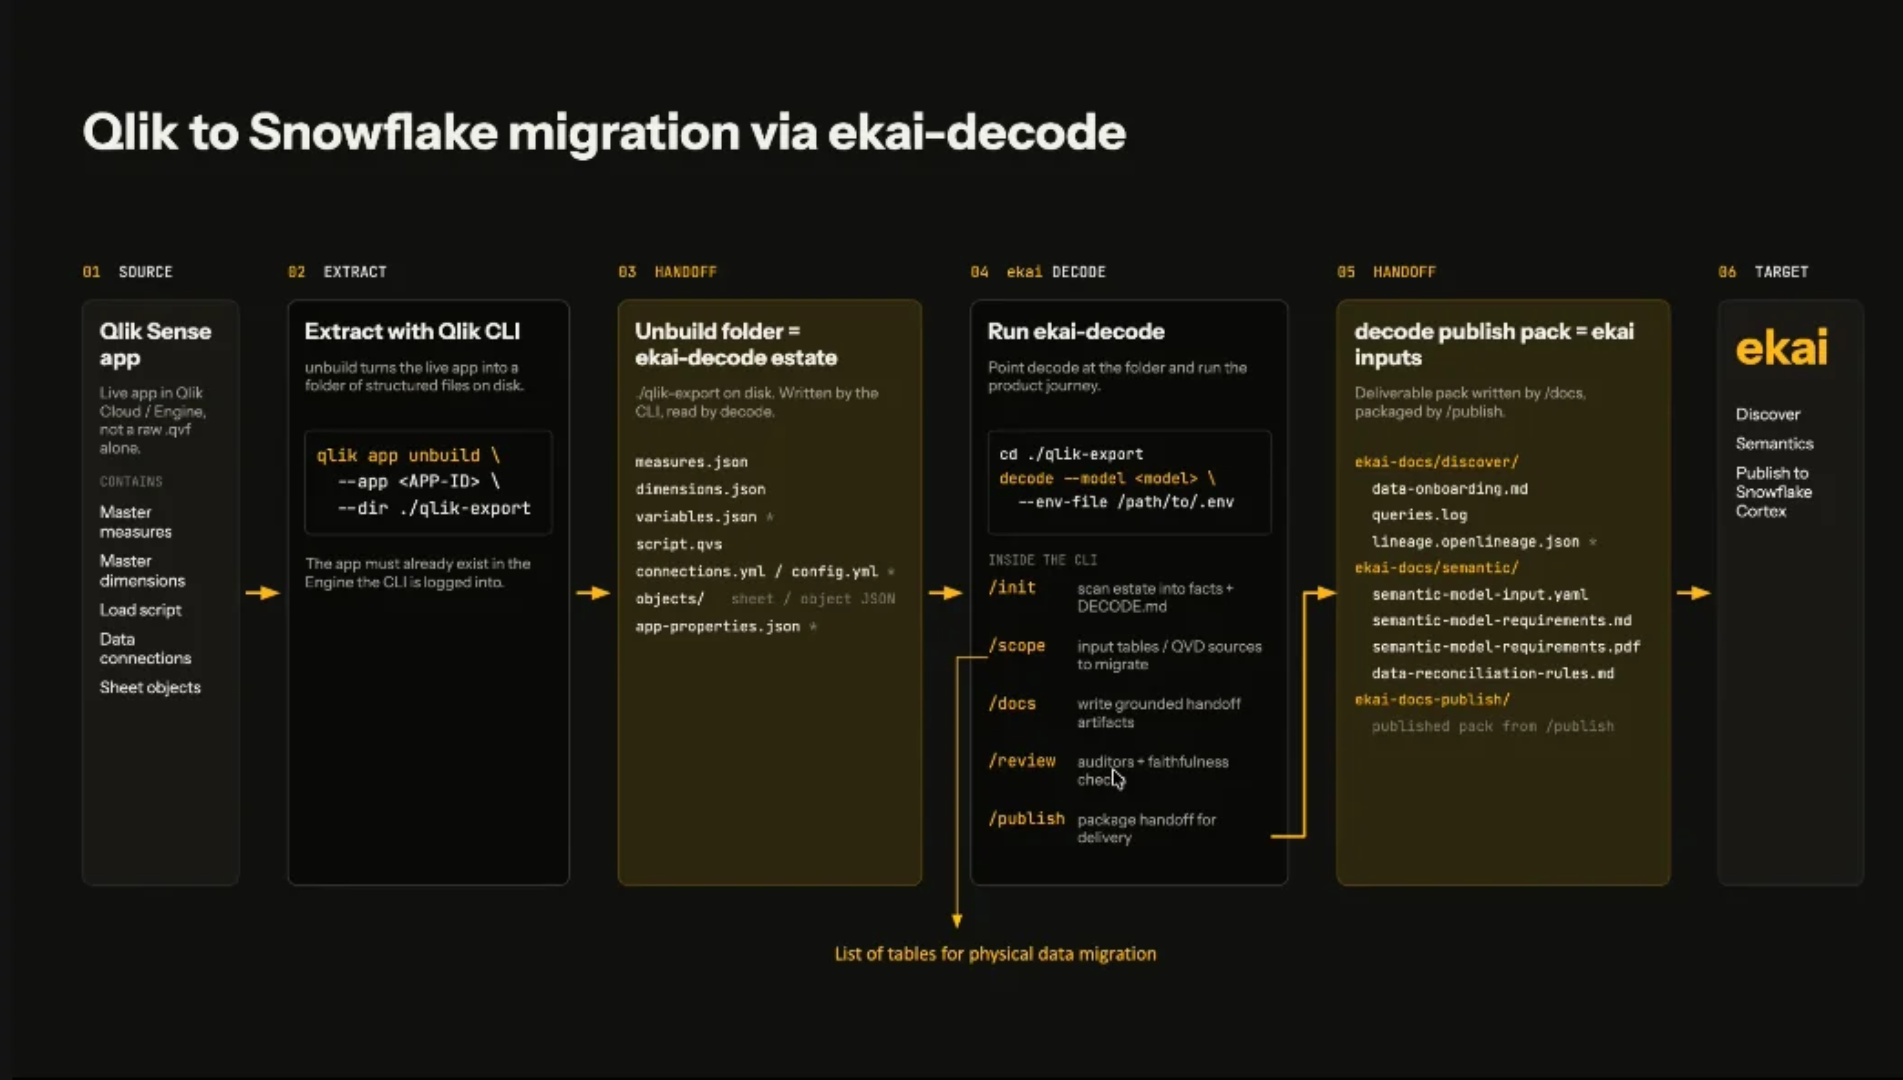
ekai-decode is a separate command-line tool. Export your legacy BI app to a folder with the BI tool's own CLI, then run ekai-decode on that folder. It does two things:
- Writes a bundle (a zip) describing the legacy model: requirements, the technical document, tables, lineage and the load script.
- Lists the tables the legacy app reads, so its data can be loaded into your warehouse as the migration's input tables.
2. Start a Migration
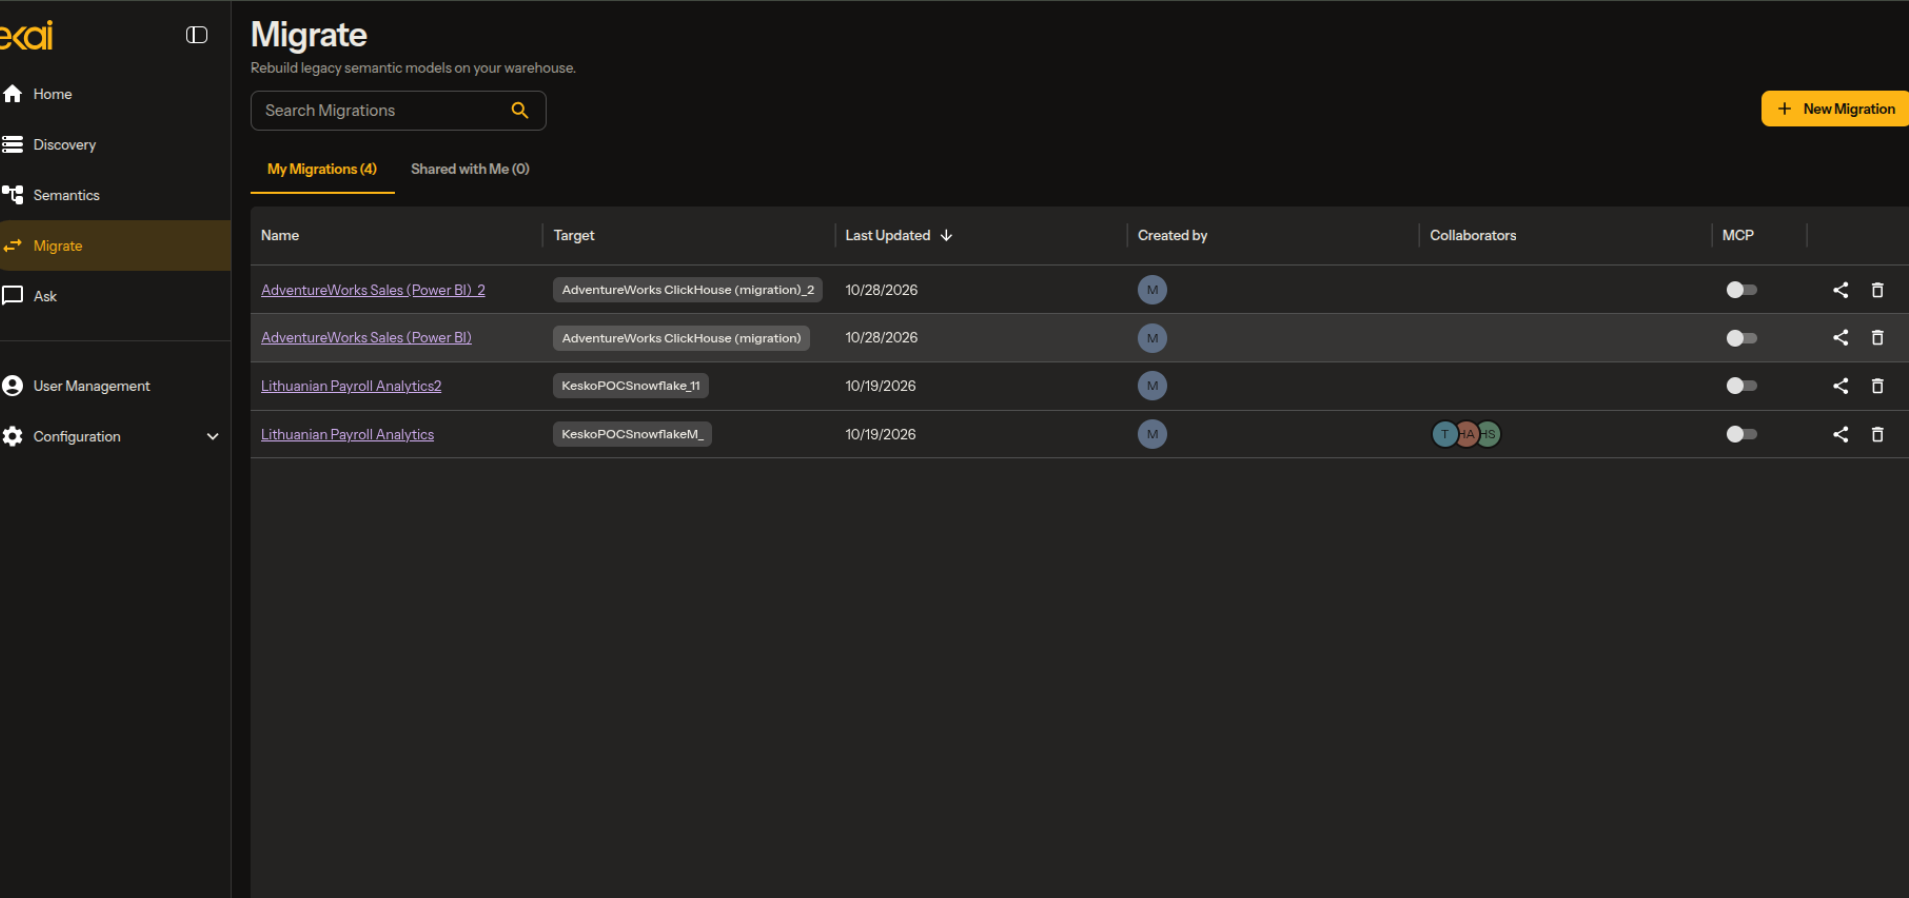
Select Migrate in the sidebar, then New Migration.
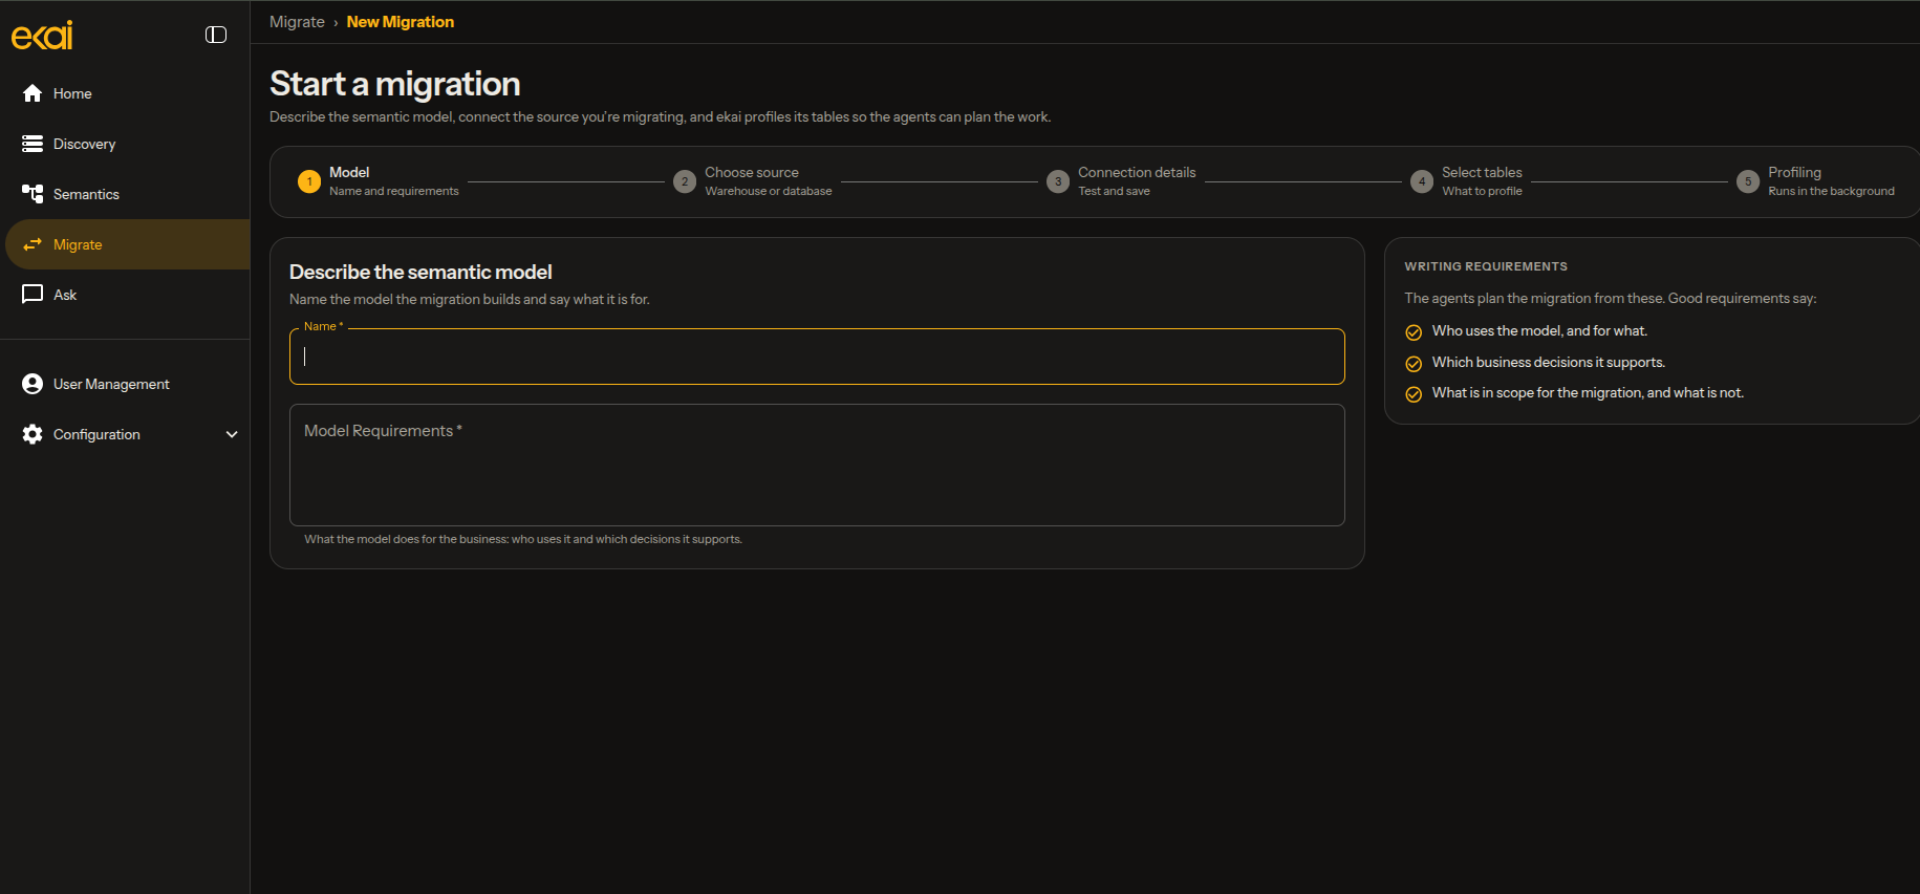
The wizard walks you through five steps:
- Model — name the model and describe what it is for
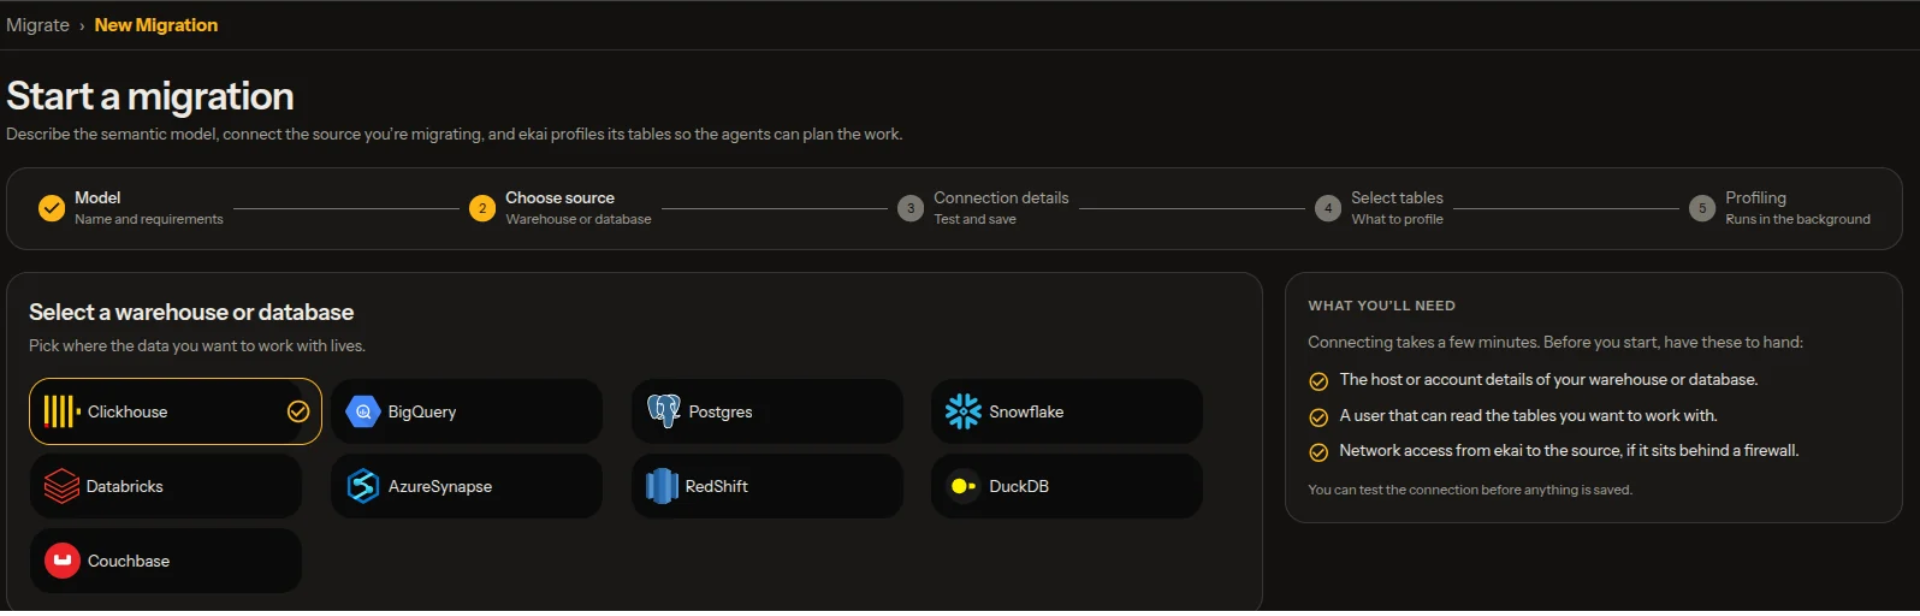
- Choose source — the warehouse holding the legacy data
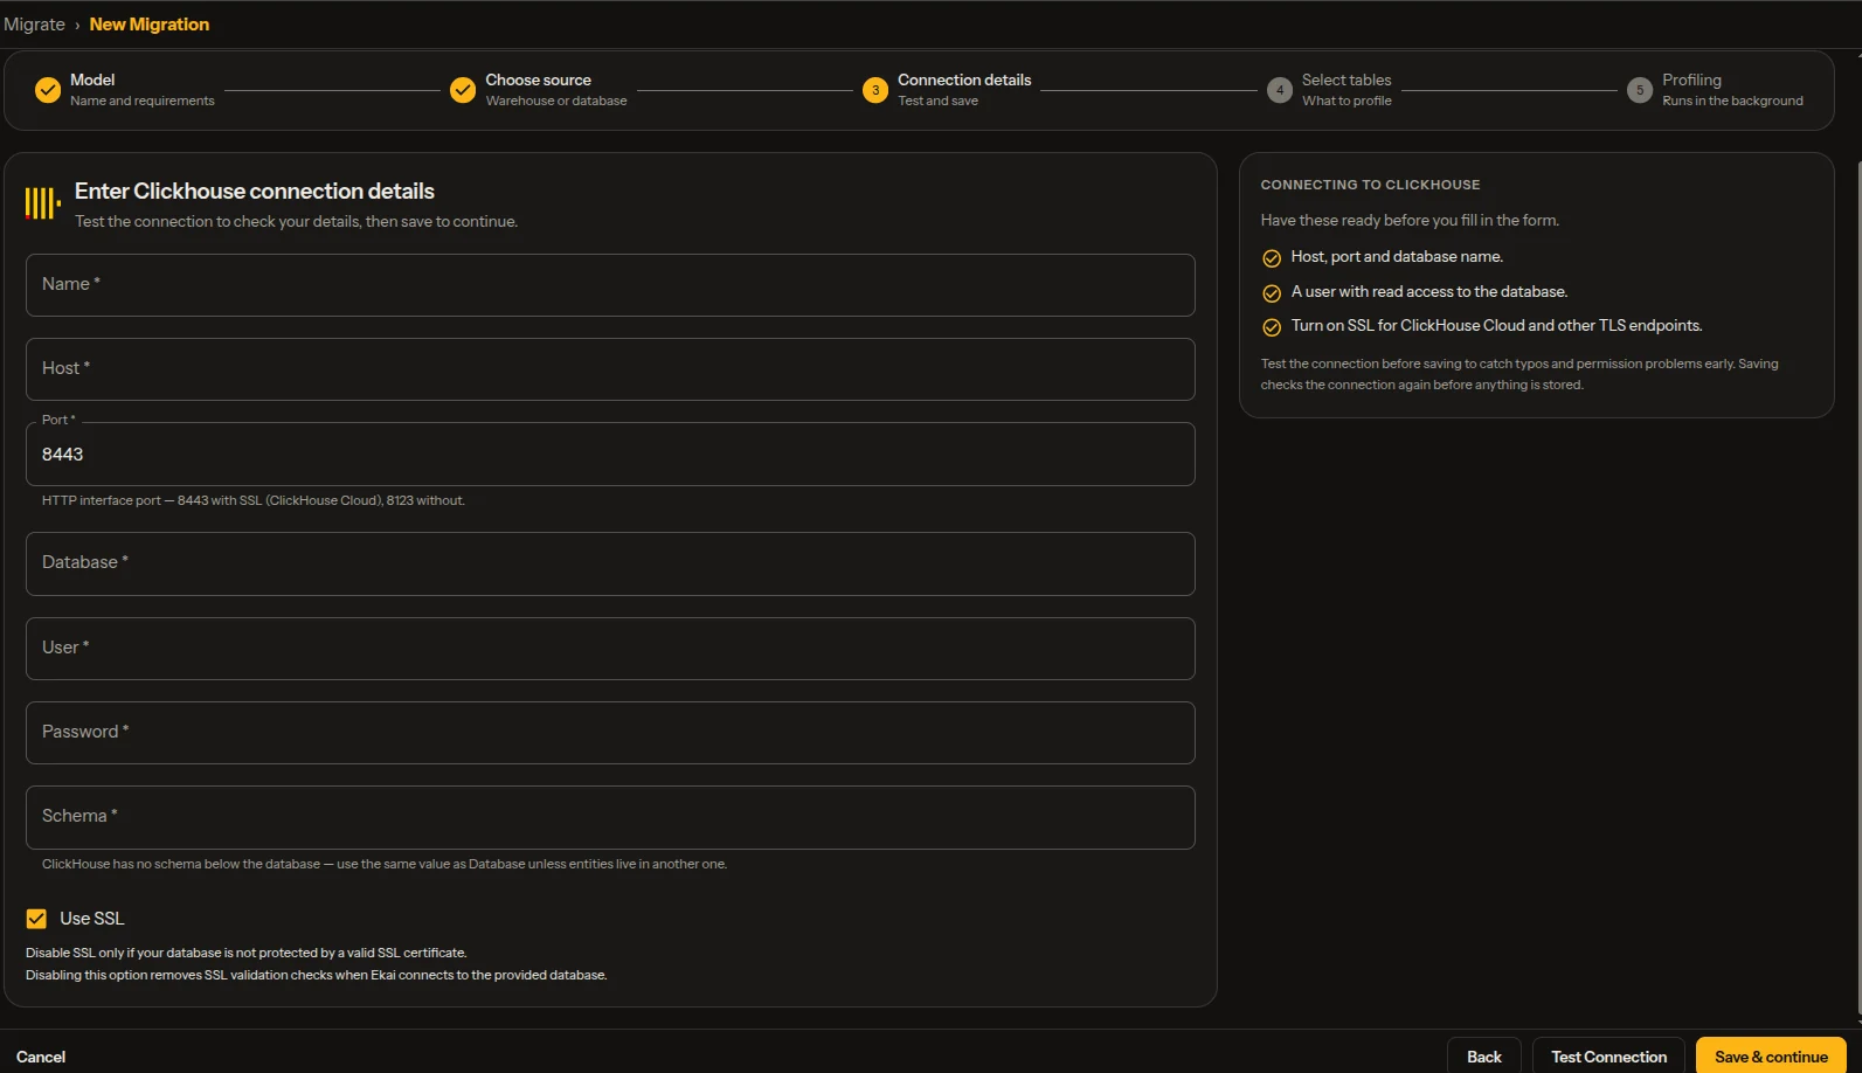
- Connection details — test the connection, then save
- Select tables — the input tables to use
- Profiling — runs in the background; then click Go to migration
3. Upload the Bundle
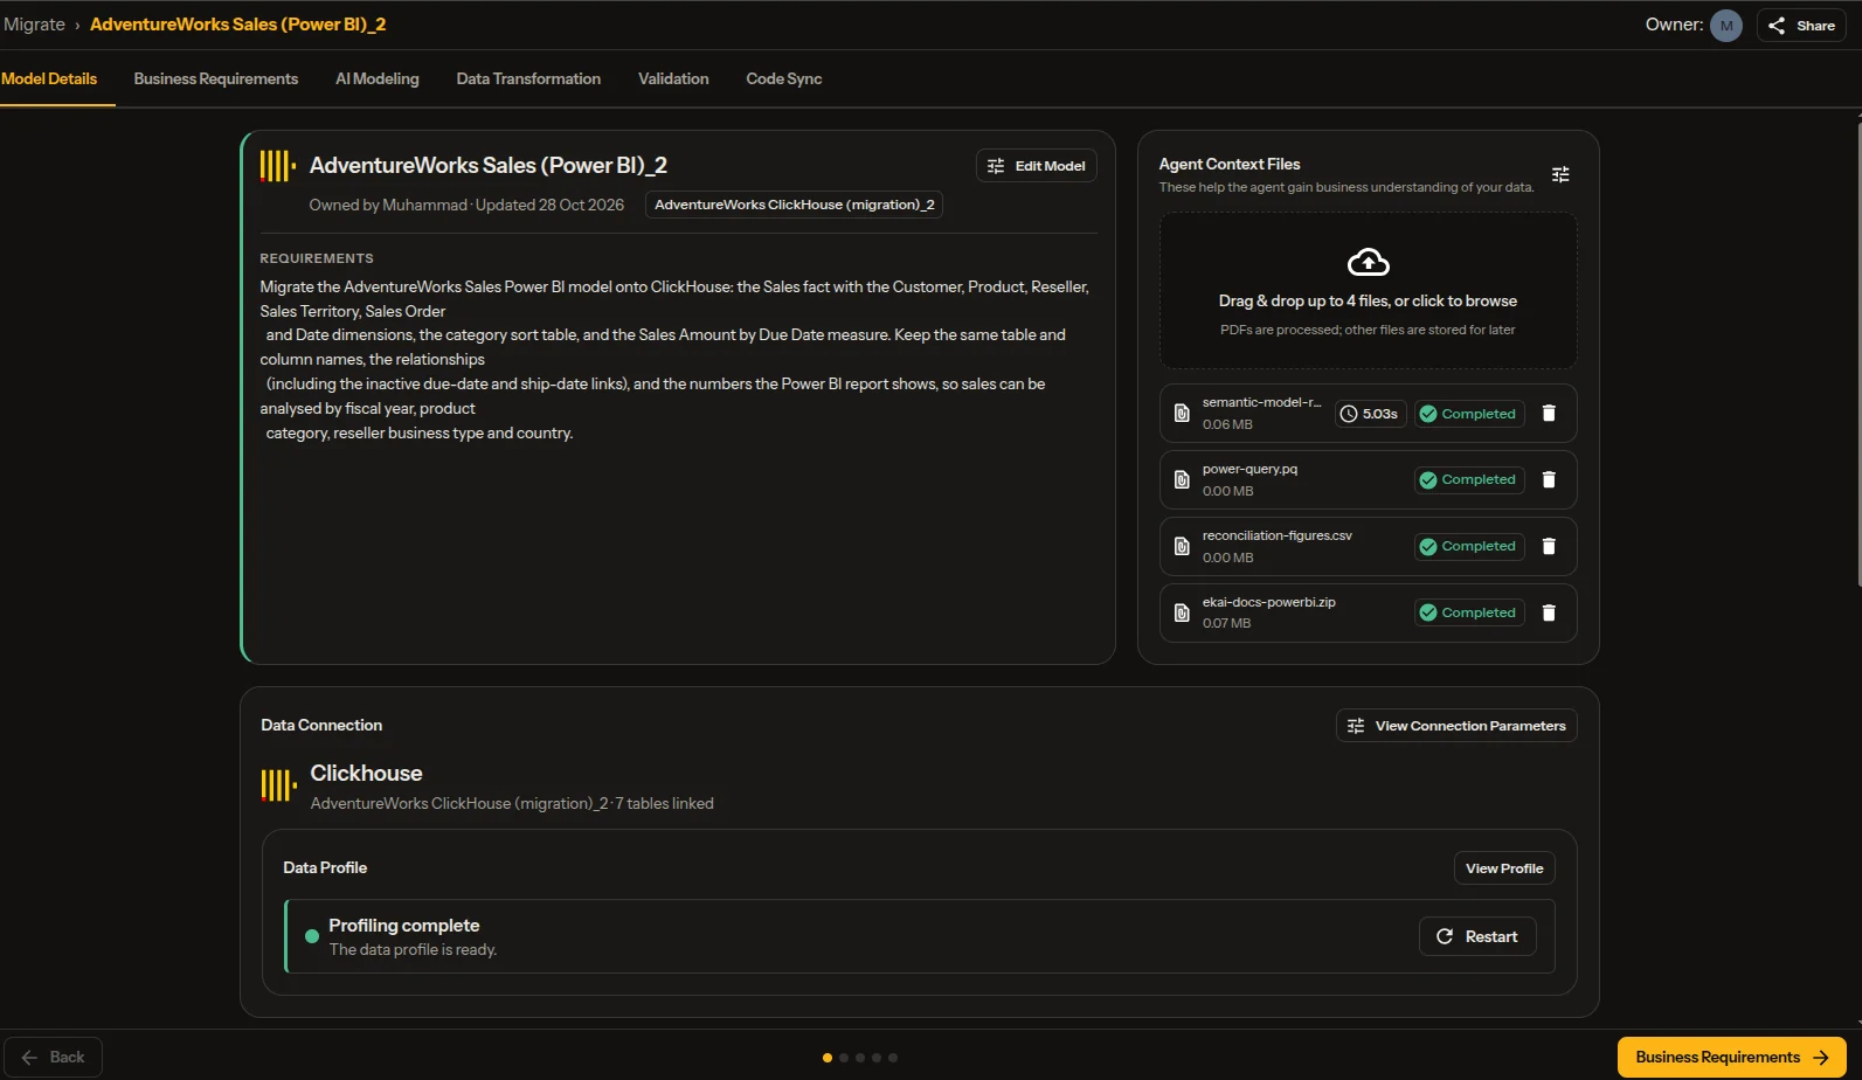
On Model Details, upload the ekai-decode zip under Agent Context Files. ekai imports it and summarises what it carried over.
Reconciliation figures are numbers from the legacy app — totals, counts, averages for given periods. ekai uses them to prove that the rebuilt model gives the same numbers. Upload them as a file in any layout, or paste them in the chat later.
4. Review the Requirements
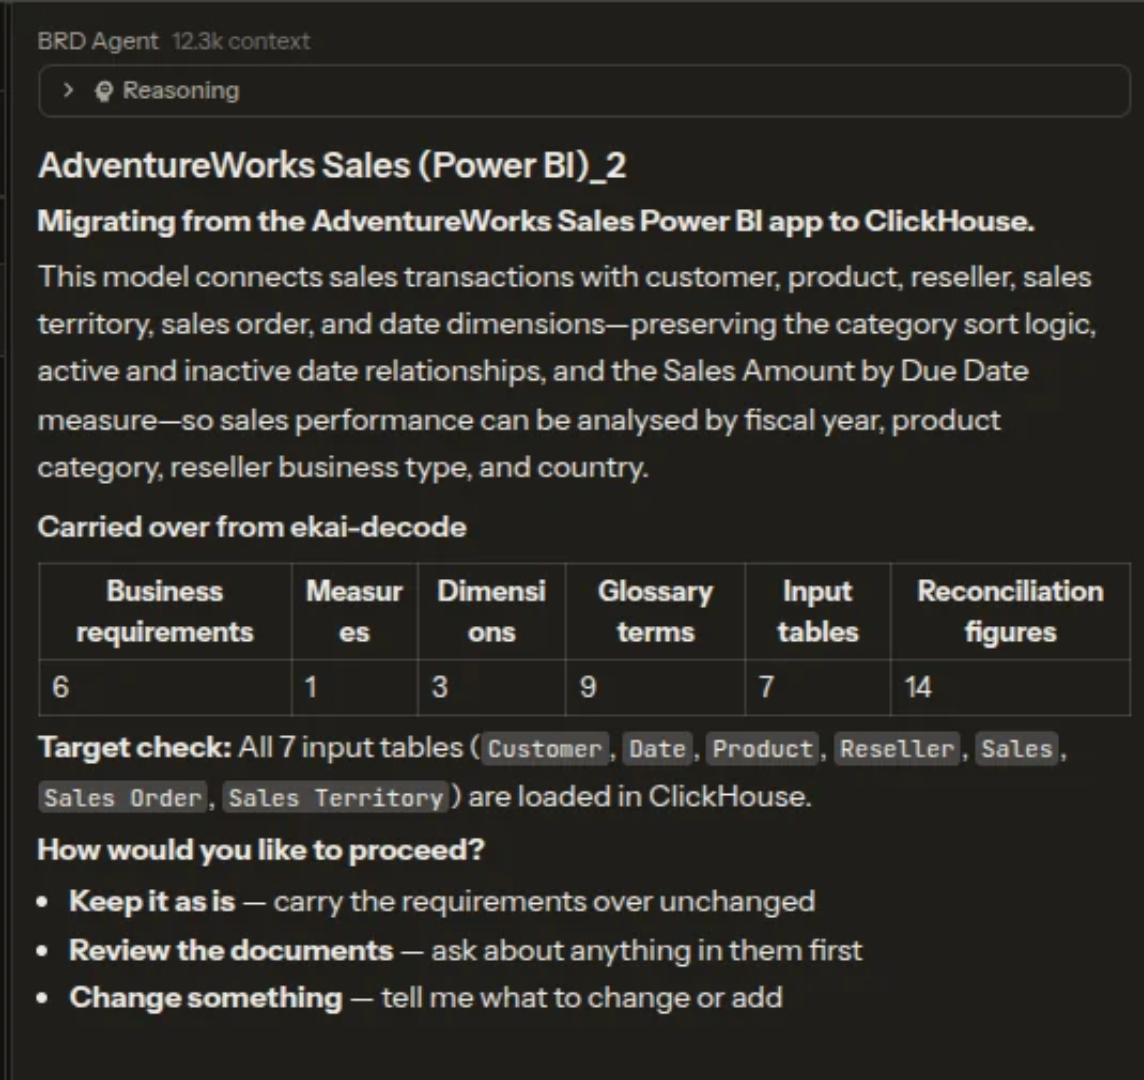
Business Requirements opens with a summary of the import: what was carried over, whether the input tables are in your warehouse, and any alerts. Then choose:
| Option | What happens |
|---|---|
| Keep it as is | The requirements go to AI Modeling unchanged |
| Review the documents | Ask about anything in them first |
| Change something | Tell the agent what to change or add |
Changes are marked (edited in ekai) or (added in ekai) in the documents. After each change, the agent asks if everything looks good before moving on.
5. AI Modeling
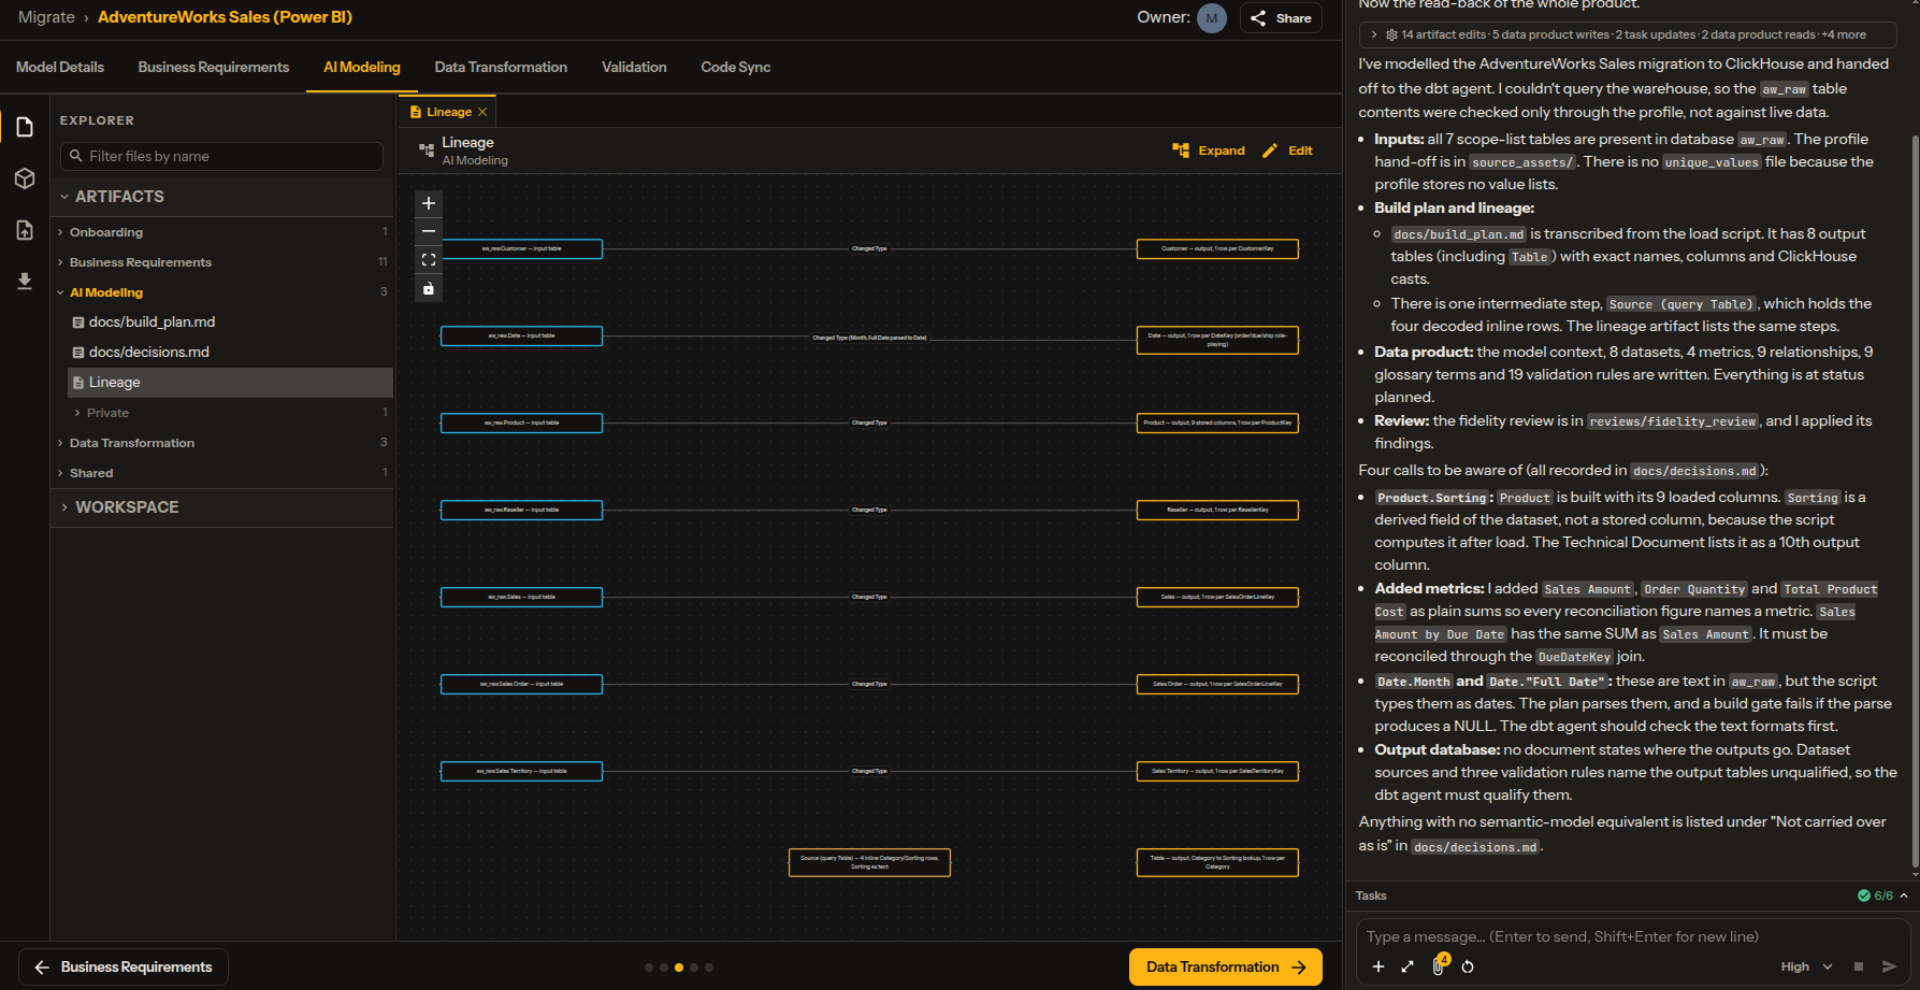
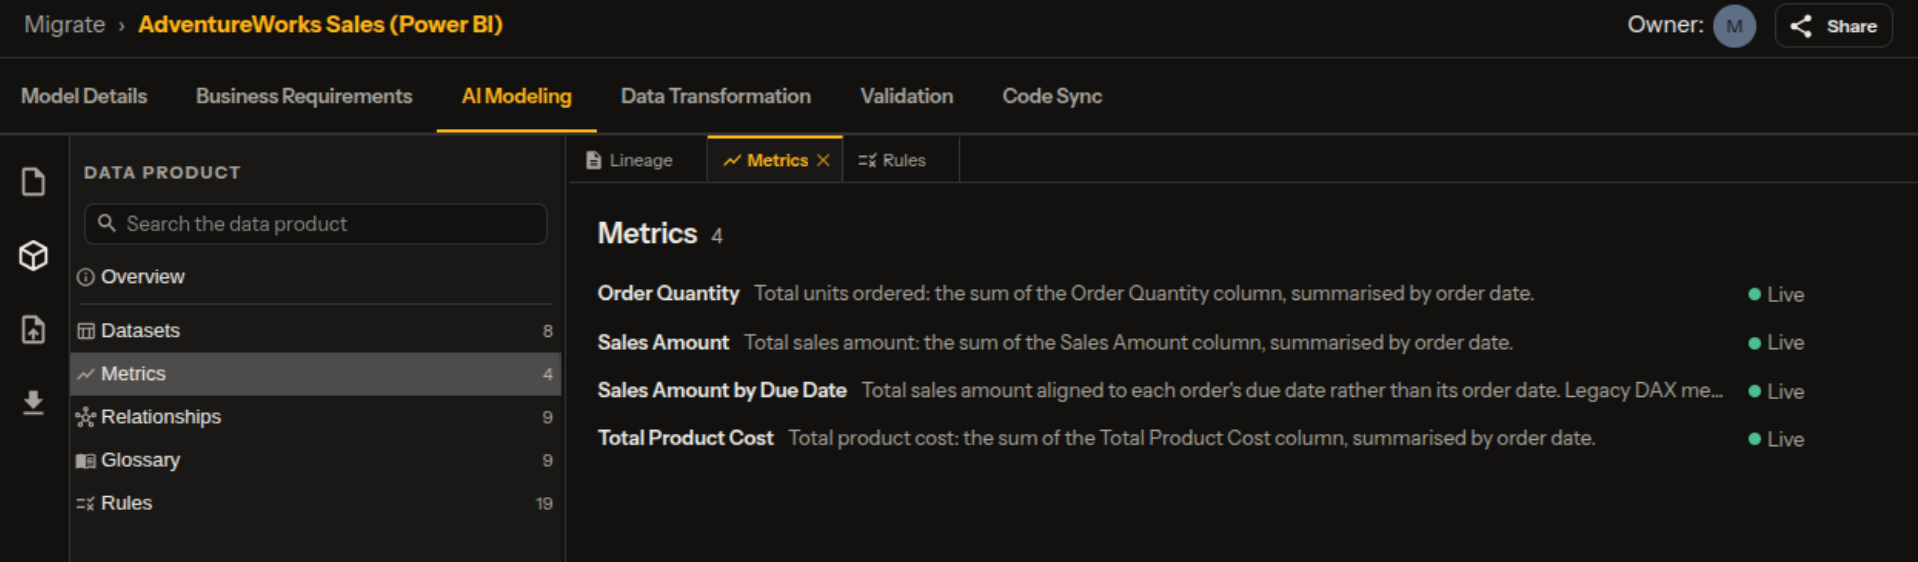
AI Modeling turns the legacy model into a build plan and a lineage diagram — every input, intermediate and output table, as the legacy load script builds them. It also defines the metrics, glossary and validation rules.
6. Data Transformation
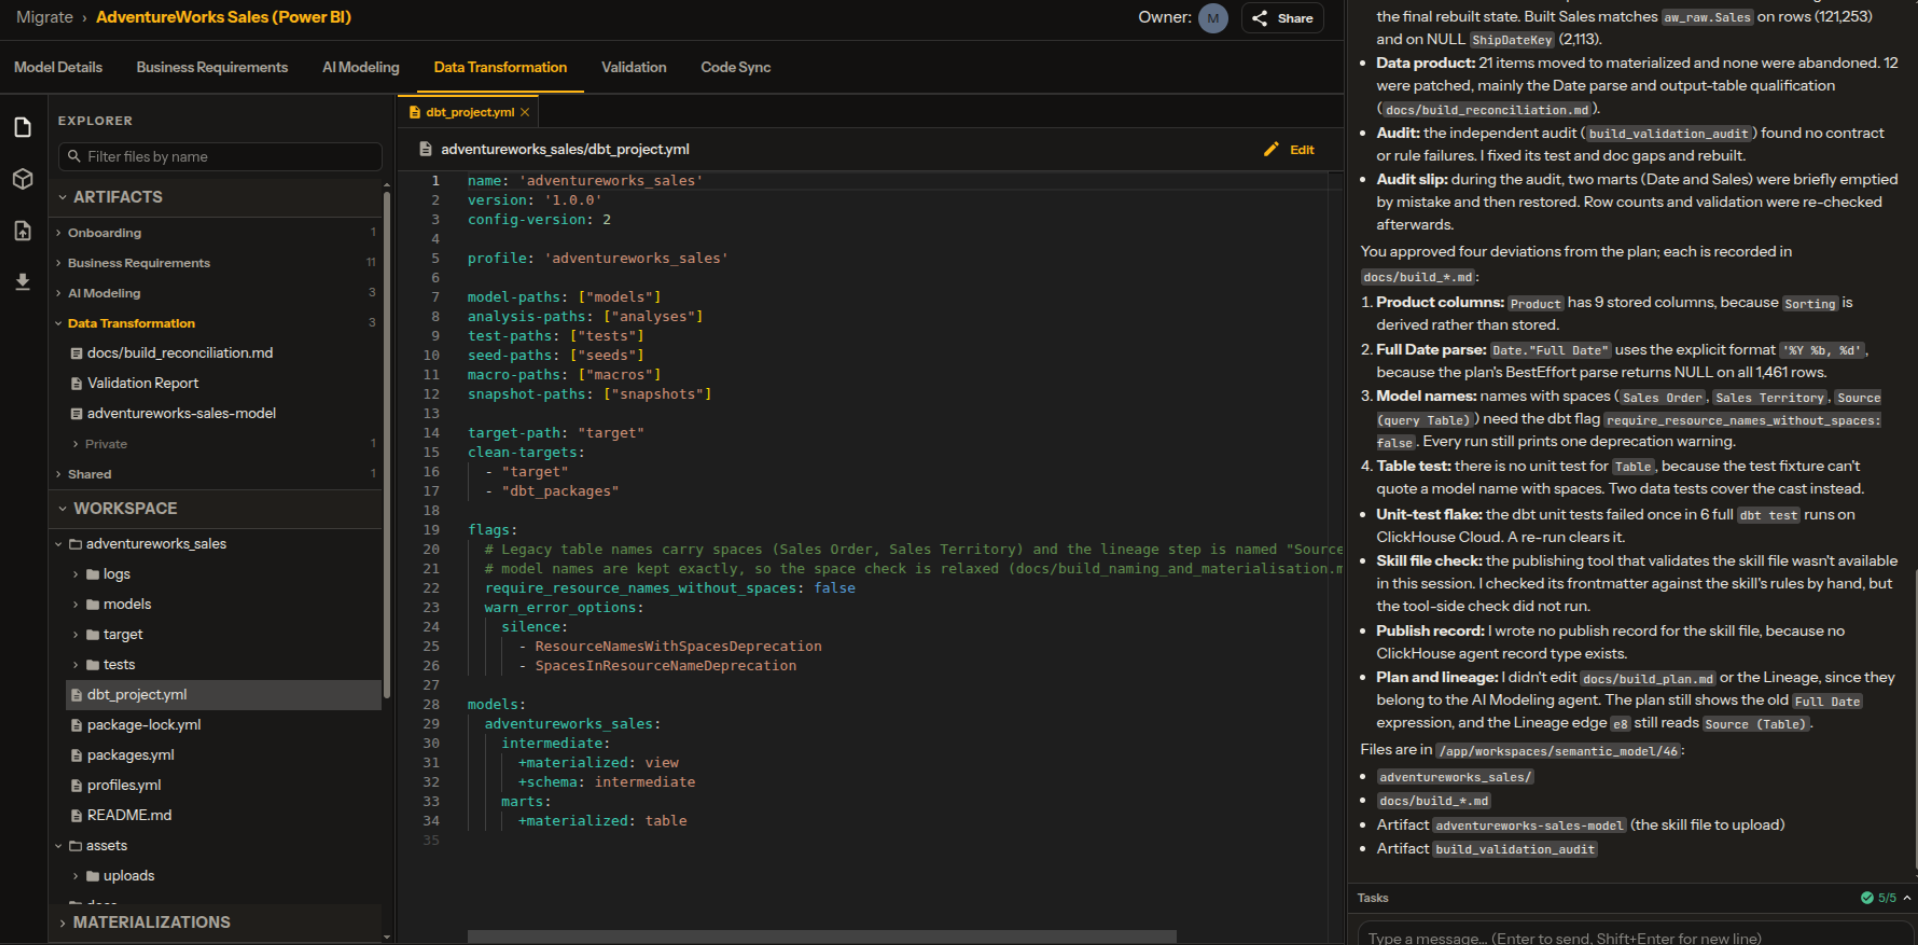
The dbt agent builds the tables in your warehouse, one model per step of the plan. Output tables and columns keep their exact legacy names — including names with spaces.
7. Validation
The Validation tab shows every check run on the built tables — the validation rules and each reconciliation figure — with its result. Each check that doesn't pass is classified:
| Result | Meaning |
|---|---|
| Model defect | The build differs from the legacy model. ekai fixes it and re-checks |
| Source data quality | The input data itself is wrong. Reported to you, never hidden |
| Not run | Something is missing — for example, reconciliation figures |
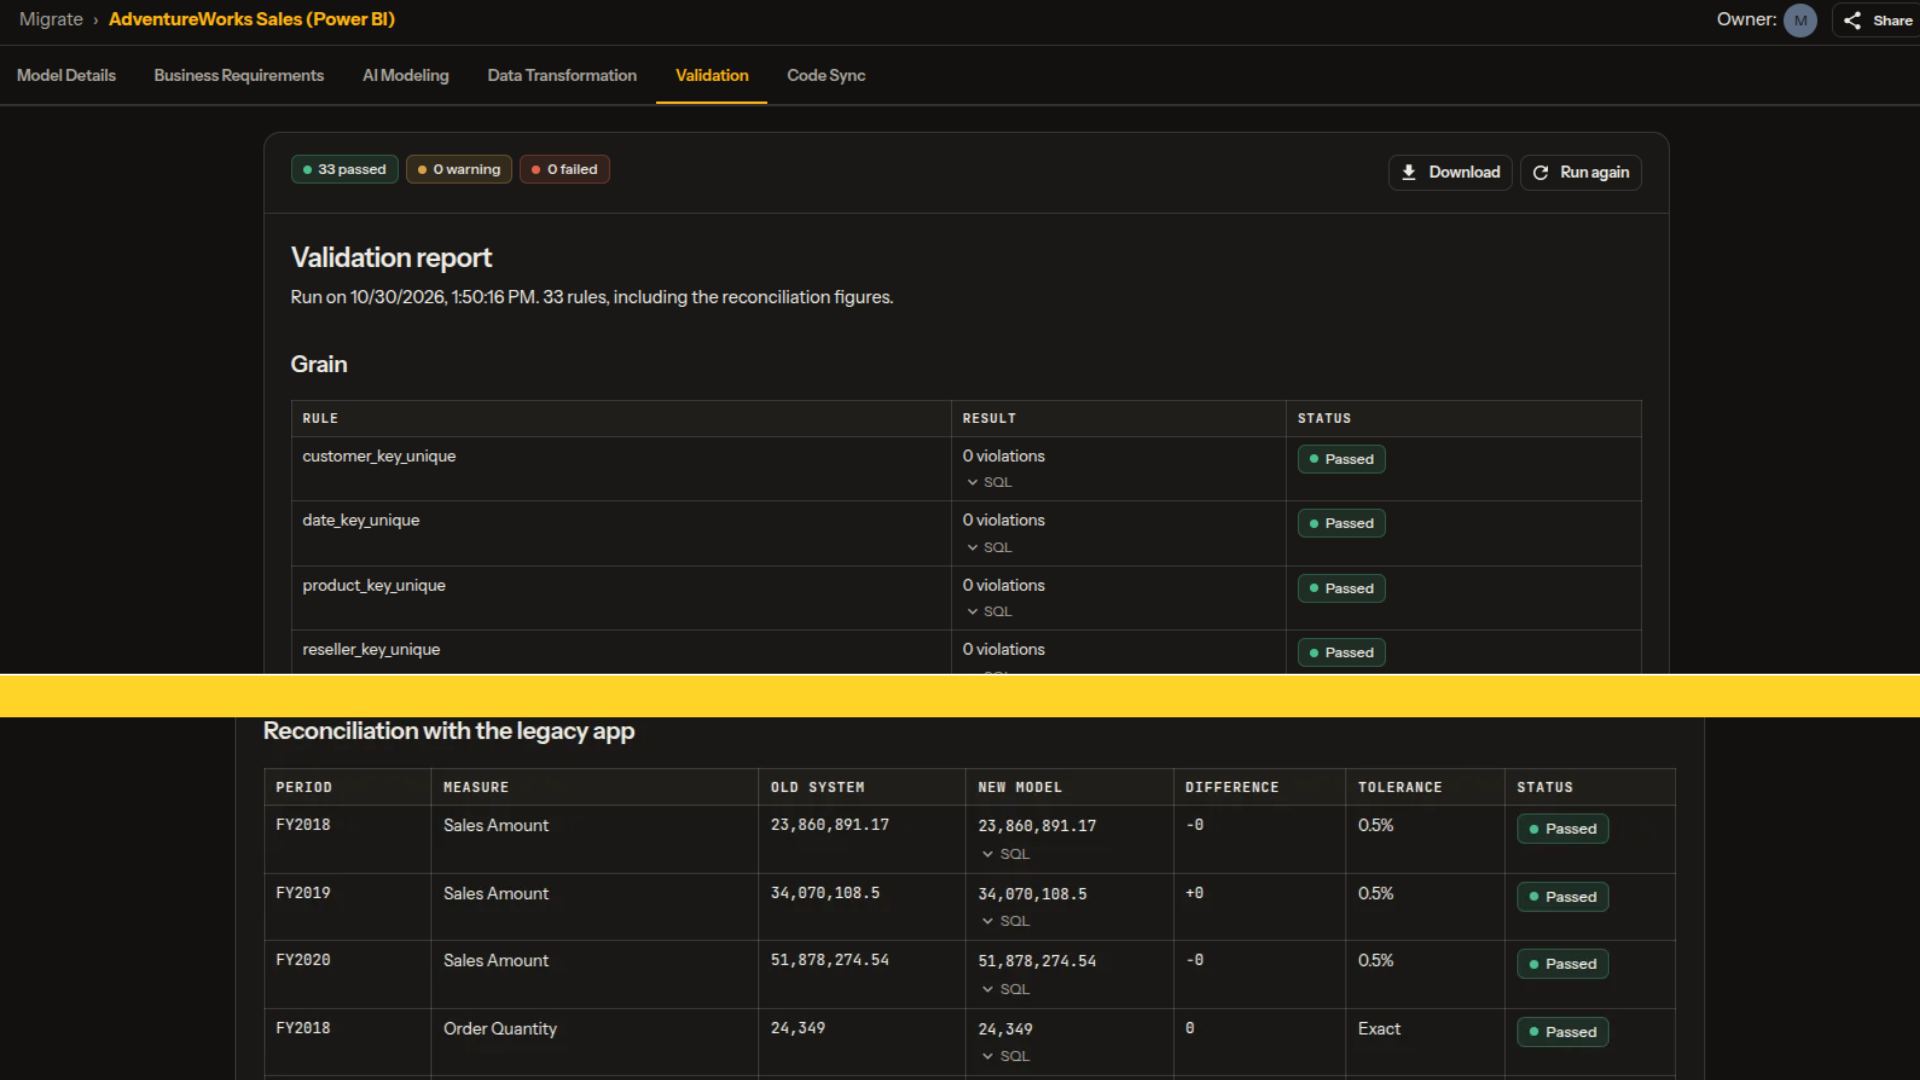
Once validation is clean, Publish and Ask Agent work the same as for any other semantic model.